Showing posts with label furniture redo's. Show all posts

Thursday, September 9, 2010

thrifty thursday - another dresser redo :)

I have another dresser makeover for you guys today! I've been wanting to get this one painted up for a while. What hung me up was the fact that it was in dire need of a good sanding and that's my worker boy husband's department. I mean, paint drips everywhere & lumps...ugh. Why do people do this to furniture?? I mean, why paint it if you're not even going to do a semi-decent job?? And the poor hardware, that had paint & gook all over it too.

Sorry guys, that's a pet peeve of mine. It ranks right up there with painting over outlet covers.

But I digress...

Do you remember this dresser/hutch/nightstand set I got at the thrift market back in May??

You might remember I redid the nightstand. That cute little table sold in my consignment booth in like a day! Guess I wasn't the only one that thought it was cute :)
And here is the dresser with a new coat of white paint...
Isn't she pretty?? When I first snatched up this dresser set I thought it might go in my daughter's room. But then I found that other dresser I shared last week so I decided the bottom part of this one would go in my foyer (the hutch is in the attic in case I change my mind later) I can't tell you how nice it looks now compared to what it looked like before. 

I haven't figured out what is going to go on the wall or the dresser yet. But I'm envisioning an olive green vase with some fall foliage in it. 

The handles got a new coat of espresso spray paint (brown).
And now they look brand new! By the way, I'm glad I could help some of you with the toothpicks in the styrafoam idea! 
I was thinking that this dresser might look good with some type of glaze on it. But I like the white so much I'm going to leave it alone...for now. But I can't guarantee that in 6 mos you won't see me doing a makeover on this dresser again!

I also want to share a little secret about this dresser. She has something a little special to share that not everyone gets to see ;)
Since the insides of the drawers weren't very pretty I decided to decoupage the lining. At first I was going to use some vintage sheet music and then came across one of the Winnie the Pooh books I found during one of my thrifty excursions. So I ripped some of the pages out (I know, but after you do it once or twice it doesn't hurt as much!) I used decoupage glue (or you could use Mod Podge) and applied it to the back side of each page & laid it out, pressing out bubbles. Then, after it was all dry I applied a coat across the top. 

Now, because my drawer isn't totally flat (there's some imperfections in the drawer, paint droplets, etc) my pages weren't going to lay totally flat. And I was ok with that. Hey, this is an old dresser. It's not gong to look perfect. I love that.

And it wouldn't be a vintage dresser redo without hardware issues...again. I'm missing several of the screws for the handles. Shhhh...don't tell anyone but the 2 bottom handles don't have screws in them! hehe It doesn't matter, that's one big drawer and you can use the upper handles til I get new screws ;)
In the next few weeks I'll have some non-furniture thrifty redo's that I've been working on!

I'll be linking up to Jen's weekend wrap up party!

Photobucket

Thursday, September 2, 2010

thrifty thursday - girly dresser redo

I am so excited for today's post!! I've been working on my daughter's dresser for a while now and I'll give you the details below. I would have had the post last week but I lost one of the dresser handles and trying to find another one for a dresser that is probably as old as me was not fun. Thankfully I found it and all is well again!! hehe

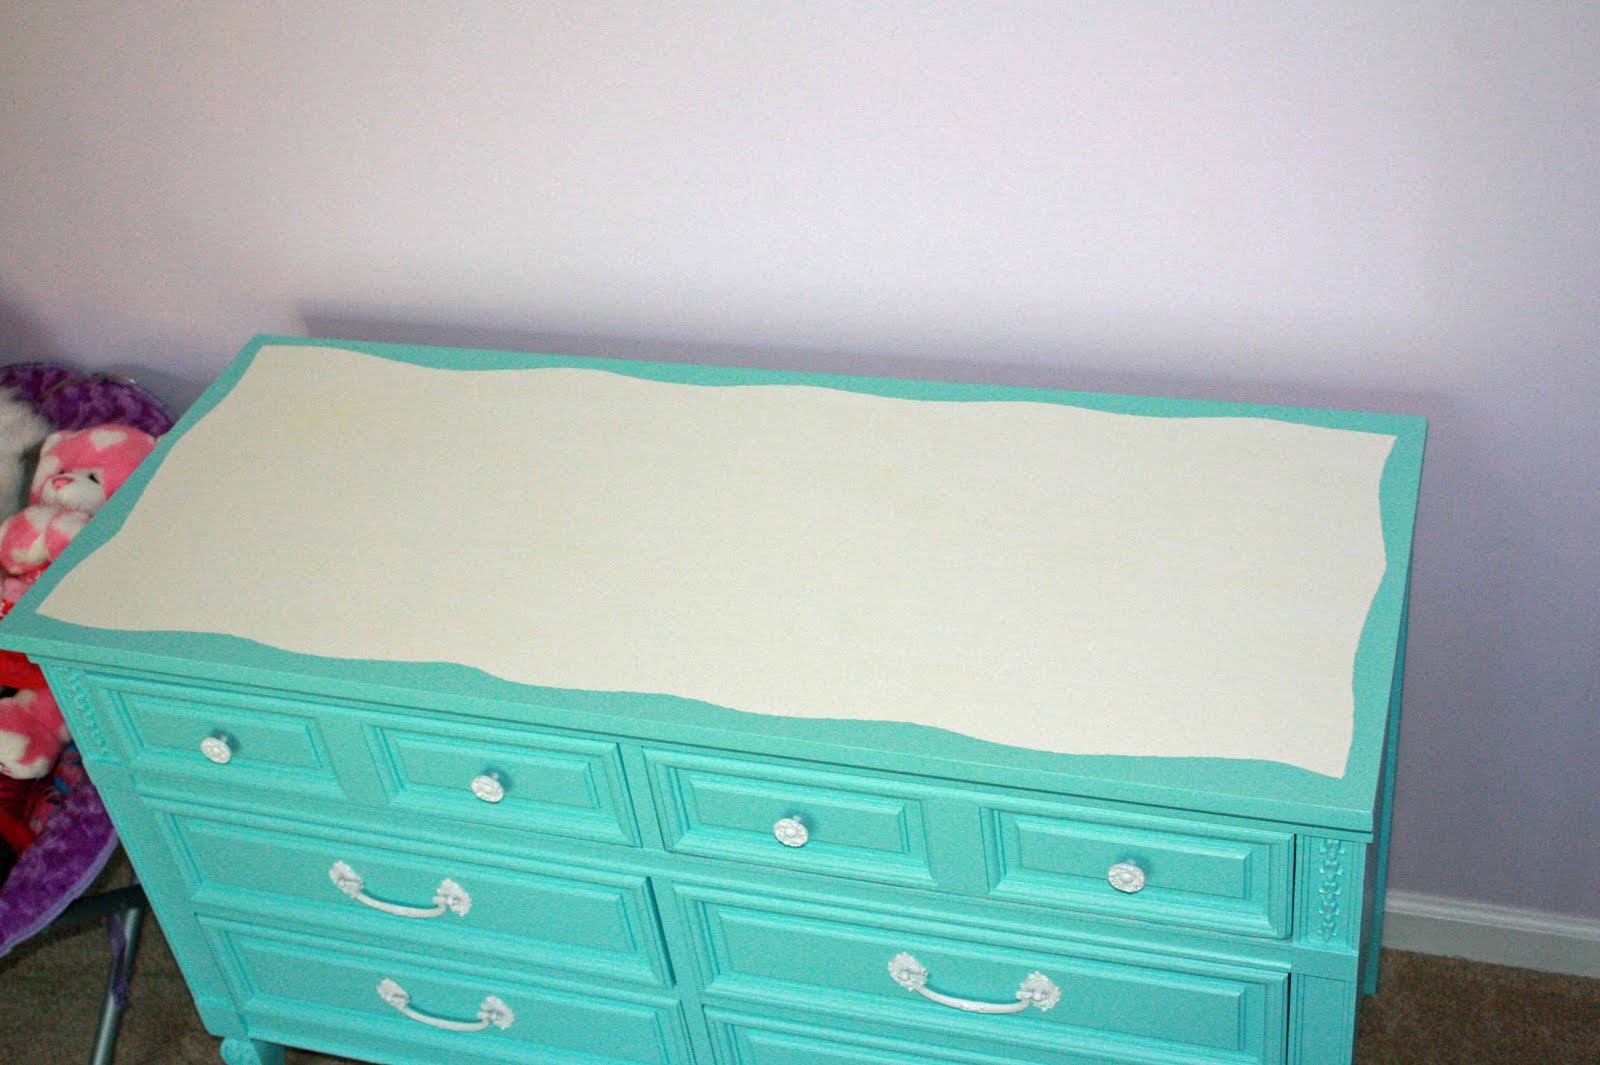
But first, let's get to the good stuff, shall we??!! Here's what it looks like now:
I'm just so thrilled with how it turned out. It makes me smile each and every time I walk in her room :) Especially since this is how it looked before:
Yuck, I know!! But this dresser had such neat details and I knew that all it needed was some TLC (and a great coat of paint!) I mean, aren't the legs on this dresser cute??
First of all, excuse the weird shadowing in these photos. My daughter's room is purple and gets mostly indirect light. I've tried every which way to take great pics in her room to no avail. Something about that purple paint makes some weird shadows, especially when I'm taking pics on the wall opposite from her window.
But let's get back to the dresser! I used True Turquoise by Glidden. 
It's the same color I used for her side table redo. I had my hubby sand the top of the dresser because it had a shiny finish. I didn't sand any other part of the dresser but I did use a primer first. I really wanted this dresser to turn out nice so I wanted to do it right. It took 2 coats of paint and we also put a coat of polyurethane on the top to keep it from getting it dinged up (cause this is going in an 8 yr old's room remember!)
Now for the top I got the idea here to do the little scalloped frame. 
Isn't it cute??! I just love it. I put the tape on the edge of one side of the dresser, then ripped it in half lengthwise weaving so it would look a bit scalloped. I did that for each side. 
Just make sure that the tape is on there securely so that when you paint none of it leaks underneath ruining your shape.
Then I used a roller to roll on the white paint (2 coats). My only regret is that I didn't make it more scalloped but I'm still happy with it. By the way, be careful if your daughter decides to go pick up her guinea pig in the middle of a painting project...
Yep, she picked the most inopportune time to go get Bugsy...Geez!!


I also used the original hardware and spay painted them white. I did prime them first, then one coat of the white.
Here's a tip when painting knobs & small stuff. You don't want to lay them directly on the surface they're sitting on because when they dry they'll stick. And that's not good. So I usually use some toothpicks in a piece of styrofoam to hold them up.

This way also makes it easier to spray paint around all the little edges & details. I mentioned above that I thought I'd lost one of the pieces. Of course, it was one of the pieces that holds the handle on. Let me tell you, trying to find hardware that will fit a vintage dresser (that doesn't cost a fortune) is hard to do. Thankfully my hubby found it in the back of my truck so we didn't have to worry about finding a replacement. Cause even if I wanted to buy 'non-vintage' hardware, the holes on this dresser were an odd size. So keep that in mind if you're refinishing older furniture. Make sure it has all its parts!!


And now for my next project - decorating above that dresser. I'll give you a hint, I'm probably going to be doing something with this:


Photobucket
Blog Widget by LinkWithin