When you take a 15 hour road trip with a 6 & 8 year old you must not only take plenty of things to do with you but also lots of snacks.
Last year I did 'state bags' and gave the kids a different snack bag every time we entered a new state. (Cause we drive through 5 states on our way up to Michigan) That worked out well, the kids thought it was neat (and even began asking for their bags when we'd hit a new state). But they were paper bags and didn't hold up well storing them in the van with all the other stuff we take on a long road trip.
So this year I thought I'd try something different. I put my handy dandy sewing skills to work and came up with these cute little sack bags for their treats.
Nothing fancy. Just used some cute fabric I found in my stash.
So here's how I did it. The beauty of these is you can make them in whatever size you want. I was using fat quarters (that are already cut to 18x21) so I simply cut an 8" strip to make my fabric 8X21.
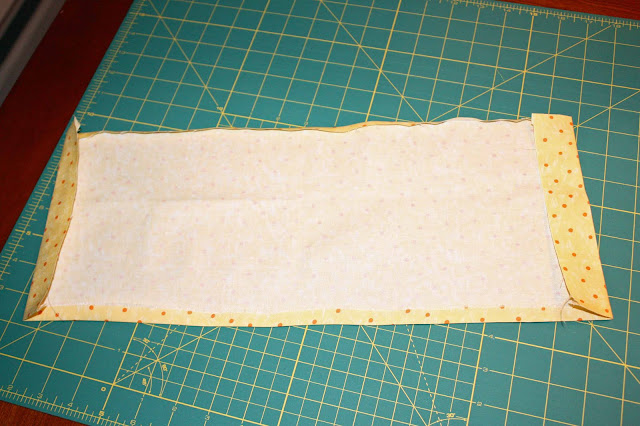
I first folded the long ends, wrong sides together, and pressed. Then I did the same thing on the short ends.
Now, you can skip folding the long ends. The reason I did that is so that I wouldn't have fraying edges where the opening for the rope is. You could totally skip this part if you don't care. And obviously if you want to make this sack bags a bit nicer, you would either double fold the edges or serge them to keep from fraying.
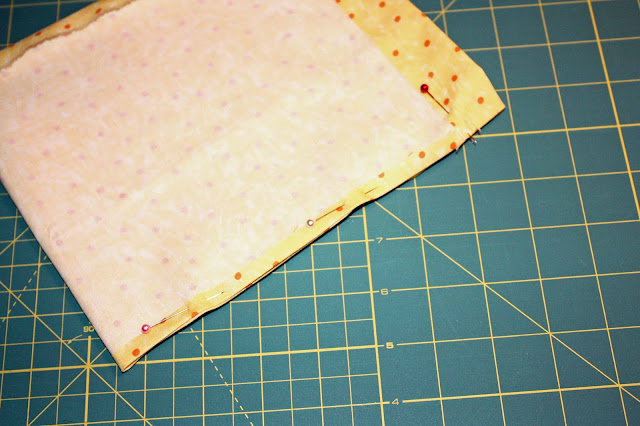
Ok, back to the bags. At the short ends, stitch along the top to leave enough room for your rope or ribbon or whatever you're using to hold your bags closed. Then fold your bag, right sides together, & pin the edges that were folded. Put another pin just at the starting point of your casing for your rope. Don't sew that part closed!
Stitch along both sides
Add your rope or ribbon and you're done!! You can have the rope tied on both sides or do what I did and run it all the way around and knot it on one side.
Now, if you're using a fabric that has a directional print, meaning it has an 'up and down', cut the fabric the same size, cut in half and turn the print around, then sew it at the bottom like this:
Remember that you'll lose about an inch of fabric making that seem so if that matters to you be sure and cut the fabric an inch longer. I didn't care, and you can't tell that 2 of the bags are a teensie bit smaller than the others!











2 comments:
This is such a cute idea and it gives your kids something to look forward to when you enter a different state.
I am sooooooooo doing this. We are going to Panama City (only 6 hours) but I will put all their goodies in these bags. One stash for trip there and another for trip back. Thanks for the idea.
Post a Comment